Futuring Project : HYDRO SMS

#chrisrand

The Hydro-SMS is like a portable and personal sonar system. It is a transceiver that allows members of a group to pass correspondence through the water without electronic transmission or revealing their identity.

Here, an umbrella becomes the low-tech devise used to transmit and receive signals. Using an off-line phone in airplane mode, text messages are converted from the ones and zero’s of code to physical motions– in this case a solenoid striking a metal rod against a metal tip umbrella. The resulting percussive sound travels through the water as a modified version of Morse code. When an open umbrella is placed in the water to listen, the membrane and surface area senses and amplifies the sound like our inner ear. The phone again translates signal to code to text.

Looking back exactly a hundred years ago to 1916, the first widespread underwater sound detection system was developed and applied to the Anti-Submarine Division of the British Navy. It featured piezoelectric crystals to produce an active messaging system with ultrasonic frequencies and large listening sensors. Similarly, this project returns to the system of sending messages through the water but uses a personal and portable system called the Hydro-SMS Transceiver. As a Speculative Future project, imagine a time when our data flow, spoken conversations, physical interactions are closely monitored by AI and used against us without consent. Agents of opposition would rely on subversive devices that can be used off-line to secretly communicate. HAPPY CENTENNIAL !

VIDEO PROCESS: storyboard and gear

hydro_sms_storyboard_wbhydro_sms_process_wb

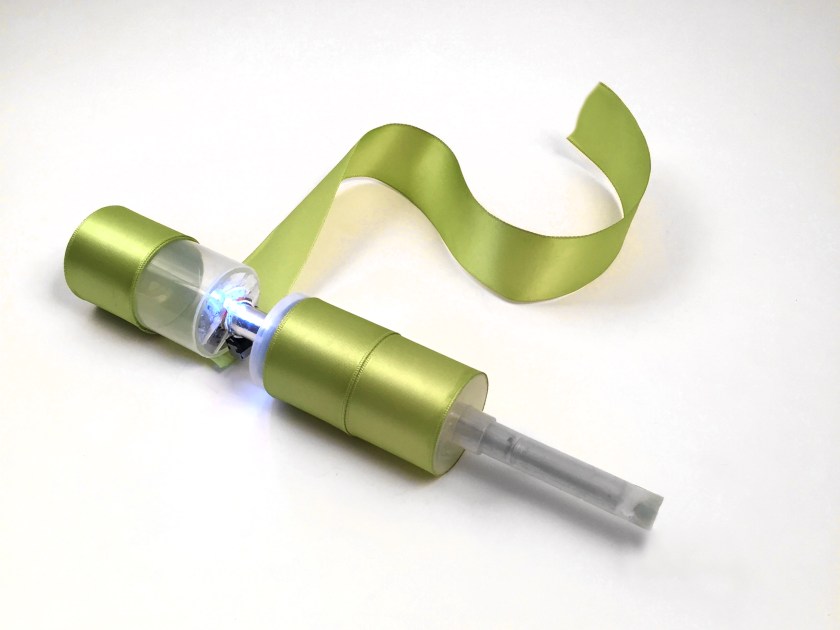
FABRICATION PROCESS : selected images from my Instructable post

hydro_sms_umbrel_wb

Above- cutting apart the post.

Below- testing the percussive tap on the umbrella tip.

hydro_sms_process_wb

hydrosms_brass_steps_wb

Above- hacking brass tube to make a mounting bracket for the solenoid.

Below- the final Arduino circuity.

hydro_sms_arduino_wb

FUTURE  DEVELOPMENT :

I would continue working on the listening portion of the transceiver using piezo sensors mounted to the umbrella and write the Arduino code to ‘listen’ and translate the taps. The app and UI also needs to be built and able to function in airplane mode.

There have been major advancements in piezoelectric technology (PI CERAMIC company’s ultrasonic sensors, actuators, and sonar systems) that could replace the mechanical solenoid and it’s power hungry 12-24 volt requirements. This would allow for percussive signals used now to be broadcast extremely rapidly and over long distances possibly using the same power that supplies the Arduino board.

Overall, this was a NEW venture for me on so many fronts– a super exciting process and satisfying outcome !

Chris  -•-•  ••••  •-•  ••  •••


Proposal : hyrdoTelegraphy

#chrisRand

For my final project, I propose an alternative method for text messaging– the long distance transmission of textual or symbolic (as opposed to verbal or audio) messages without the physical exchange of an object bearing the message. This is not a message in a bottle nor is it achieved through carrier pigeons, rather it’s rooted in the early 1800’s developments in electrical telegraphy and mashedUP with the 1950 initiative SOSUS (sound surveillance system).

I will build a Hydro-Telegraphy Transceiver for use now and in a future time when people must gather at reserviors, lakes and calm bodies of water to ‘silently’ communicate to one another. Meanwhile, coast to coast, our nation is being outfitted with canals and aqua-ducts in place of defunct data comm and telephone wires.

From my sketchbook;

c_rand-5524_wbc_rand-5522_wb

Beginning with existing hydrophones, which are listen-only devices, I want to add a means of broadcasting a language similar to morse code and possibly translating it to the user aurally as English.

Using Arduino controlled sensors and script functions:

  • piezoelectric sensor = input
  •  LED = output (possibly a electromagnetic speaker for translating code to English)
  • Arduino controlled actuators create a percussive ‘clap’ sound
  • One challenge is to determine if I can use existing software or code to translate morse code to spoken words, and another challenge will be to create a water-tight and simple devise.
  • One push-pull solenoid (https://www.adafruit.com/products/413)
  • Battery case/sled for 12V supply

Links to prior similar work and/or tutorials:


hydrophone_footage_wb

IN/OUT : Vibrations

#chris rand

img_5372_tn

VIDEO :

The input & output of the piezo sensors were set to their maximum value for this demonstration video. The camera microphone captures both the sound of the water falling onto the umbrella and the tones emanating from the output piezo.

OBJECTIVE : an Arduino project that senses physical vibrations and produced audible tones.

INSPIRATION : personal experience listening to an umbrella act as a vibration amplifier during a rainstorm or by feeling the vibrations from audible environmental noise in NYC.

APPLICATION : 1) Similar to the computational command (c:rand),  a random generator that convert the vibration of raindrops on a surface membrane into numbers or tones. 2) Explore how an INPUT/OUTPUT sensor can be applied to tree branches to reduce limb breakage due to the buildup of wet snow- reducing damage to old growth trees and avoiding power outages.

MY PROCESS :

I began by researching if piezo sensors can be used simultaneously as input and output sensors and found only written reference to guide my exploration. The difficulty is to use the Arduino board’s digital and analogue pins which are normally used when more that one sensor is present in the circuit.  In theory this is possible so I built a split-leg piezo, realized it needed a resistor to protect my board, soldiered a few other versions, and tried to write the code to map both functions. img_5337

img_5334-fail

(above) Don’t cross the circuit when adding a resistor LOL !

img_5345_wb

CODE : looks simple enough but as a beginner it took me 3 1/2 hours and help from 3 people to get everything correct. It combines two different codes; one for knock and one for tone with a map function that sets the parameters between the two. I included technical descriptions in the code below (grey text) to exhibit what I learned.

piezox2_screenshot

I adhered the output piezo inside of a plastic cup to increased the amplitude of the tones and protect the sensor.

img_5382_tn

(Below) Here is how it looked when the circuitry and code are functioning properly.

img_5352_tn

CONCLUSION :

I would continue experimenting with the one piezo sensor to execute both functions with help from more people and more trial and error. I would also create a small scale model of how this can be applied to my second intended application;

Explore how an INPUT/OUTPUT sensor can be applied to tree branches to reduce limb breakage due to the buildup of wet snow- reducing damage to old growth trees and avoiding power outages.

This process was a difficult but rewarding investigation into understanding and writing code. As a person who learns best by tactile and experiential methods, I was shocked in awe of the varieties of sensors and circuitry available when visiting Tinkersphere store ( 304 East 5th Street, NYC 10003). I have so many more ideas now of Arduino projects to build.

img_5321_tn

TEAlight : diffused by fabric

#chrisrandimg_3131

img_3189

fullsizerender-1

fullsizerender-8

Between a Teardown and a Hack: exactly where I like to be !

For my second iteration of light diffused by fabric, I continue exploring how physical interaction with an object can change the illumination of a single LED without varying the current or digitally changing the diode.  As per the assignment, this project uses no Arduino circuitry and an abundance of hand-sewn stitches to join fabric.

For those that remember,  I just can’t shake the notion that this is strangely similar to the 1980’s trendy craft of cross-stitching.

fullsizerender-3

I tested and selected this synthetic fabric, called Shimera: 78% Nylon and 22%Spandex, because of the soft and even glow it produced. It was stubborn to work with until I provided the tea strainers as a base structure. Beyond stitching, the majority of the effort was applied to reshaping the stainless steel hoop as described in the following video; TEAlight : process video

The plastic packaging from the stainers is another iteration in layered light shades. Each side of the spherical wrapper can be frosted and tinted which will allow the user to mix their own color of light.

All in all, this was very enjoyable! Big UPs to Becky for a great assignment.

TEAlight : in process from Chris Rand on Vimeo.

Fabric Diffused Light

#chrisrand : my goal with this exercise was to make a lantern that can be physically adjusted to produce different intensities of light without regulating the current- not using a dimmer.

lightdiffuse1lightdiffuse2lightdiffuse3

Bands of fabric ribbon are wrapped around a plastic cylinder from a one layer thick to four layers thick. The central plunger (and handle) contains four AAA batteries that power a LED. The LED is contained between two plastic caps covered in mylar which restrict the light to illuminate one band at a tim. As the plunger moves, the light is muted like an analog dimmer.

The video shows the subtle effect that is created with only one LED and a detail view of interior guts. I was pleasantly surprised that the saturation of the green ribbon gets deeper as the illumination is muted.

lightdiffuser-diagram